本文持续更新,主要记录日常Android开发过程中遇到的一些问题及解决办法和需要注意的一些点。
建议每个Android开发者都搭配一套抓包的环境(Charles、Fiddler),这样就能很方便的看到打开一个页面后发起了哪些网络请求、时序,以及每个请求的耗时、数据包大小,便于进行接口调试、优化等。
ListView的headerView和footerView设置setVisibility(View.GONE)无效,headerView和footerView虽然不显示了,但还是会占位,会显示一块空白区域。如果headerView和footerView不打算使用了,可是调用ListView的removeHeaderView()、removeFooterView()方法;如果有多个headerView,只是想展示隐藏其中的一个,后面可能还会用到再显示出来,可以使用下面的方法:
123456789FrameLayout frameLayout = new FrameLayout(this);listView.addFooterView(frameLayout);............//For adding footerViewframeLayout.removeAllViews();frameLayout.addView(mFooterView);//For hide FooterViewframeLayout.removeAllViews();使用自定义shape的方式作为Button的背景时,开发机上显示白色的,但在有些手机上显示出来的颜色有可能是黑色的,原因在于不同的品牌和ROM预置的主题风格不同,有些是light,有些可能会是dark。解决的办法是在定义shape的时候指定solid:
123456789101112131415161718<?xml version="1.0" encoding="utf-8"?><selector xmlns:android="http://schemas.android.com/apk/res/android"><item android:state_pressed="true"><shape android:shape="oval"><solid android:color="@color/transparent" /><stroke android:width="0.5dp" android:color="@color/t_grey_title" /><corners android:radius="2dp" /></shape></item><item><shape android:shape="oval"><solid android:color="@color/transparent" /><stroke android:width="0.5dp" android:color="@color/bg_line" /><corners android:radius="2dp" /></shape></item></selector>通过Intent调起手机拨号页面的功能大多数APP都有,但是有一点需要注意,该操作运行在没有电话和短信功能的Android平板上会FC。解决办法是startActivity之前判断一下系统能否处理打电话或发短信的Intent:
12345private boolean isIntentAvailable(Intent intent) {PackageManager packageManager = getPackageManager();List<?> list = packageManager.queryIntentActivities(intent, PackageManager.MATCH_DEFAULT_ONLY);return list.size() > 0;}如果要在代码中设置TextView或者Button的color,而该color定义的selecter资源的话,直接使用textView.setTextColor(getResources().getColorStateList(R.color.radio_text_color))只能显示默认状态下的颜色,点击时颜色不会变,需要使用下面的方法:
1textView.setTextColor(getResources().getColorStateList((R.color.radio_text_color)));
- 在代码中设置TextView的textSize时,字体的大小可能不是我们想要的,比如这么用的话:1textView.setTextSize(getResources().getDimension(R.dimen.textsize));
原因在于getResources().getDimension(R.dimen.textsize)返回的是结果是以px为单位的,而setTextSize(float size)方法是以sp为单位。这时候可以用下面的方法设置:
同理,getTextSize()的返回值是以像素(px)为单位的。
- 有这样的需求,比如一排显示3个Button,每两个相邻的Button之间有一段间距,但是某些情况下根据服务端的动态配置,有可能显示任意两个Button,这时候无论是在layout中定义还是通过代码控制都显得不太灵活。其实有一种更好的方案,那就是android:divider属性:123456789101112131415161718192021<LinearLayout xmlns:android="http://schemas.android.com/apk/res/android"android:layout_width="match_parent"android:layout_height="wrap_content"android:divider="@drawable/spacer_medium"android:orientation="vertical"android:padding="@dimen/spacing_medium"android:showDividers="middle"><LinearLayoutandroid:id="@+id/buttons_container"android:layout_width="match_parent"android:layout_height="wrap_content"android:orientation="horizontal"android:divider="@drawable/spacer_medium"android:showDividers="middle"><!-- Buttons --></LinearLayout></LinearLayout>
代码的第13、14行设置了在LinearLayout的子属性中间默认添加一个drawable,相应spacer_medium的定义如下:

- 服务端接口上线前,经常要绑定测试环境的host进行联调,手机只要有ROOT权限,设置host有一大堆的App可以用,但是总觉得为了这么一个小小的功能还要安装一个App太过麻烦,也不够极客。可以用命令行的方式直接操作host文件:1234adb rootadb remountadb shellbusybox vi /ets/hosts
编辑完保存即可。busybox的命令集在好多ROM中都集成了,没有的话安装一个就行了,这样就可以直接通过vi的命令操作手机里的文件了。
通过代码设置TextView的drawableLeft、drawableRight…时,在调用setCompoundDrawables()前必须先调用Drawable的setBounds()方法,否则图片无法显示。或者直接使用setCompoundDrawablesWithIntrinsicBounds()方法:
123456Drawable leftDrawable = getResources().getDrawable(R.drawable.praise);leftDrawable.setBounds(0, 0, leftDrawable.getMinimumWidth(), leftDrawable.getMinimumHeight());textView.setCompoundDrawables(leftDrawable, null, null, null);textView.setCompoundDrawablePadding(20);// ortextView.setCompoundDrawablesWithIntrinsicBounds(leftDrawable, null, null, null);对于ViewGroup组件,可以设置android:descendantFocusability属性,控制是否让子控件先获得焦点,值有:
beforeDescendants:viewgroup会优先其子类控件而获取到焦点
afterDescendants:viewgroup只有当其子类控件不需要获取焦点时才获取焦点
blocksDescendants:viewgroup会覆盖子类控件而直接获得焦点在onTouchEvent当中,使用getX和getRawX的区别
其中getX是相对于容器的坐标,比如它是在某个ListView中,或者其他ViewGroup当中。getRawX是相当于它在屏幕的坐标。如果在Fragment中写了新的构造方法,那么同时一定要提供一个public的无参构造方法。因为Activity在恢复状态时会通过反射的方法(class.newInstance())实例化Fragment,同时,如果Fragment如果是内部类,那么一定不能是非静态的。
123456789101112131415public T newInstance()throws InstantiationException,IllegalAccessExceptionCreates a new instance of the class represented by this Class object. The class is instantiated as if by a new expression with an empty argument list. The class is initialized if it has not already been initialized.Note that this method propagates any exception thrown by the nullary constructor, including a checked exception. Use of this method effectively bypasses the compile-time exception checking that would otherwise be performed by the compiler. The Constructor.newInstance method avoids this problem by wrapping any exception thrown by the constructor in a (checked) InvocationTargetException.Returns:a newly allocated instance of the class represented by this object.Throws:IllegalAccessException - if the class or its nullary constructor is not accessible.InstantiationException - if this Class represents an abstract class, an interface, an array class, a primitive type, or void; or if the class has no nullary constructor; or if the instantiation fails for some other reason.ExceptionInInitializerError - if the initialization provoked by this method fails.SecurityException - If a security manager, s, is present and any of the following conditions is met:invocation of s.checkMemberAccess(this, Member.PUBLIC) denies creation of new instances of this classthe caller's class loader is not the same as or an ancestor of the class loader for the current class and invocation of s.checkPackageAccess() denies access to the package of this class使用hide()和show()来切换Fragment时,会回调Fragment的onHiddenChanged()方法,其它的生命周期方法都不会回调。
家里电脑没有配置翻墙的情况下如果想更新Android SDK可以设置代理、使用国内的镜像。
Server:mirrors.neusoft.edu.cn
Port:80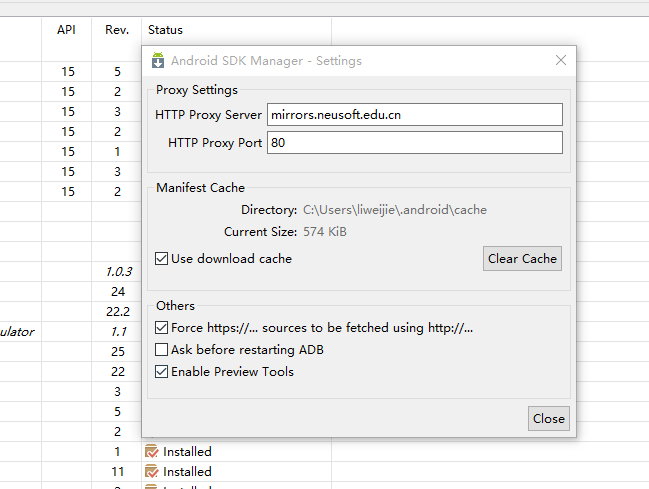
PopupWindow要想实现点击外部区域dimiss的话,必须在代码中设置其backgroud,因为设置了背景以后会在外面包裹一个父控件(PopupWindow内部类PopupViewContainer)来处理ouside 触摸事件。preparePopup()方法的代码:
123456789101112131415161718192021if (mBackground != null) {final ViewGroup.LayoutParams layoutParams = mContentView.getLayoutParams();int height = ViewGroup.LayoutParams.MATCH_PARENT;if (layoutParams != null &&layoutParams.height == ViewGroup.LayoutParams.WRAP_CONTENT) {height = ViewGroup.LayoutParams.WRAP_CONTENT;}// when a background is available, we embed the content view// within another view that owns the background drawablePopupViewContainer popupViewContainer = new PopupViewContainer(mContext);PopupViewContainer.LayoutParams listParams = new PopupViewContainer.LayoutParams(ViewGroup.LayoutParams.MATCH_PARENT, height);popupViewContainer.setBackground(mBackground);popupViewContainer.addView(mContentView, listParams);mPopupView = popupViewContainer;} else {mPopupView = mContentView;}尽量避免给window和Activity同时都设置了背景,这样会造成过渡绘制,会增加大约一倍左右内存。如果BaseActivity的根布局文件中已经设置了background,那么就在Ancitivy的主题中把windowbackground设置成null。选其一,不要两个地方都设置:
1<item name="android:windowBackground">@null</item>9.png图片不要用tinypng压缩,否则会有问题。
IntentService内部使用HandlerThread维护了一个消息队列,start一个IntentService并不能保证立即就能执行其onHandleIntent()方法,必须等到上一次启动的任务执行完之后按顺序往下执行。当消息队列中最后一个消息被执行完成时才会真正的stop掉Service自身。
在Activity或Fragment的onDestroy()方法中记得要销毁前面创建的Dialog,否则当App退到后台Activity或Fragment被系统杀掉时,Dialog会保持其引用而引发窗体泄露。WebView也一样,否则会引发内存泄露。
1234567891011public void onDestroyView() {super.onDestroyView();if (mWebView != null) {mWebView.removeAllViews();mWebView.destroy();}if (mDialog != null) {mDialog.dismiss();}}通过ps | grep package 查出进程号 然后kill -9 *
12ps | grep com.xiaomi.shopkill -9 13244
但是这种只能杀掉指定进程号的进程,如果一个App打开了多个进程,这种方法并不能一次把这个APP打开的进程全部杀掉。
am force-stop package是所有杀App方案中最彻底有效的,能强杀指定包名的app的所有进程(包括fork出来的子进程)以及广播等组件信息。
4.4 KitKat之后调试WebView可以远程使用Chrome,真的很强大!具体参考

在布局文件中,如果只是为了占位,可以用 Space 来取代 View, 最主要的是Space可以跳过 Draw 这个过程。
HashMap其实采用的空间换时间的策略,在内存宝贵的移动平台上还是比较占内存的,如果key是int类型的话,官方推荐使用SparseArray。在数据量不太大的情况下,二者性能差距并不明显。
onTrimMemory,在Application中重写此方法,会在内存紧张的时候回调(支持多个级别),便于我们主动的进行资源释放,避免OOM。